# Send01.html
<body>
<div>
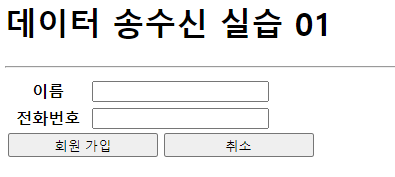
<h1>데이터 송수신 실습 01</h1>
<hr>
</div>
<!-- 내가 한 풀이
<div>
<form action="Receive01.jsp" method="post">
이름 <input type="text" name="name"><br>
전화번호 <input type="text" name="tel"><br><br>
<input type="submit" value="button">
</form>
</div>
-->
<!-- 수업시간 풀이 -->
<div>
<form action="Receive01.jsp" method="post">
<table class="table">
<tr>
<th>이름</th>
<td>
<input type="text" name="userName" class="txt">
</td>
</tr>
<tr>
<th>전화번호</th>
<td>
<!-- <input type="text" name="userTel" class="txt"> -->
<input type="tel" name="userTel" class="txt">
</td>
</tr>
<tr>
<td colspan="2">
<button type="submit" class="btn" style="width: 150px;">회원 가입</button>
<button type="reset" class="btn" style="width: 150px;">취소</button>
</td>
</tr>
</table>
</form>
</div>
</body>➰체크할 내용➰
1) 클라이언트 측에서 서버 측에 데이터 전송 및 페이지 요청을 위해 form 태그 필요
2) form 태그 영역 안에 들어가야 하는 전송 해야하는 데이터와 submit
3) form 태그의 action 속성은 데이터를 전송하며 요청하는 jsp 페이지의 주소 지정
4) form 태그의 method 속성은 데이터 전송 및 페이지 요청 방식 → get 또는 post
5) id, name 속성은 어떤 영역에서 어떤 식별자를 활용하느냐에 따라 적절히 판단하여 부여할 수 있어야 함!
6) name 속성은 JSP 에서 주로 사용하게 될 식별자
7) submit 을 통해 전송 기능 수행
8) < 『<input type="submit" value="> 과 동일한 코드 <button type="submit" > 회원 가입
- button 은 이미지 또는 다른 태그들을 포함할 수 있으며, input은 스타일 구성을 폭넓게 할 수 있다.
# Receive01.jsp
<%@ page contentType="text/html; charset=UTF-8"%>
<%-- 내가 한 풀이
<%
request.setCharacterEncoding("UTF-8");
String name = request.getParameter("name");
String tel = request.getParameter("tel");
%>
--%>
<!-- 수업시간 풀이 -->
<%
// 스크립릿 영역
// 이전 페이지(Send01.html)로부터 전송된 데이터 수신
// → userName, userTel
// 한글 수신을 위한 인코딩 방식 지정
request.setCharacterEncoding("UTF-8");
String userName = request.getParameter("userName");
String userTel = request.getParameter("userTel");
%>
<!DOCTYPE html>
<html>
<head>
<meta charset="UTF-8">
<title>Insert title here</title>
<link rel="stylesheet" type="text/css" href="css/main.css">
</head>
<body>
<div>
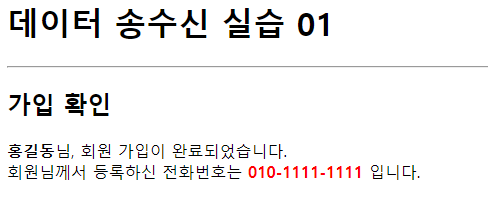
<h1>데이터 송수신 실습 01</h1>
<hr>
</div>
<%--내가 한 풀이
<%=name %>님, 회원 가입이 완료되었습니다.<br>
회원님께서 등록하신 전화번호는 <%=tel %> 입니다.
--%>
<!-- 수업시간 풀이 -->
<div>
<h2>가입 확인</h2>
<span style="color: blud; font-weight:bold"><%=userName %></span>님,
회원 가입이 완료되었습니다.<br>
회원님께서 등록하신 전화번호는
<span style="color: red; font-weight:bold"><%=userTel %></span> 입니다. <br>
</div>
</body>
</html>
# Send02.html
<body>
<div>
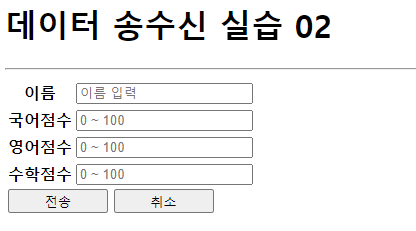
<h1>데이터 송수신 실습 02</h1>
<hr>
</div>
<!-- 수업시간 풀이 -->
<div>
<form action="Receive02.jsp" method="post">
<table class="table">
<tr>
<th>이름</th>
<td>
<input type="text" name="userName" class="txt" placeholder="이름 입력">
</td>
</tr>
<tr>
<th>국어점수</th>
<td>
<input type="text" name="kor" class="txt" placeholder="0 ~ 100">
</td>
</tr>
<tr>
<th>영어점수</th>
<td>
<input type="text" name="eng" class="txt" placeholder="0 ~ 100">
</td>
</tr>
<tr>
<th>수학점수</th>
<td>
<input type="text" name="mat" class="txt" placeholder="0 ~ 100">
</td>
</tr>
<tr>
<td colspan="2">
<button type="submit" class="btn" style="width: 100px;">전송</button>
<button type="reset" class="btn" style="width: 100px;">취소</button>
</td>
</tr>
</table>
</form>
</div>
</body>
# Receive02.jsp
<%@ page contentType="text/html; charset=UTF-8"%>
<%
	// 스크립릿 영역

	// 이전 페이지(Send02.html)로부터 넘어온 데이터 수신
	// → userName, kor, eng, mat

	request.setCharacterEncoding("UTF-8");

	String userName = request.getParameter("userName");
	String korStr = request.getParameter("kor");
	String engStr = request.getParameter("eng");
	String matStr = request.getParameter("mat");

	int kor, eng, mat;
	kor=eng=mat=0;

	int tot=0;
	double avg=0;

	try
	{
		kor = Integer.parseInt(korStr);
		eng = Integer.parseInt(engStr);
		mat = Integer.parseInt(matStr);

		tot = kor + eng + mat;
		avg = tot / 3.0;
	}
	catch(Exception e)
	{
		System.out.println(e.toString());
	}

%>

<!DOCTYPE html>
<html>
<head>
<meta charset="UTF-8">
<title>Receive02.jsp</title>
<link rel="style" type="text/css" href="css/main.css">

<style type="text/css">
	span {color: blue; font-weight: bold; font-size: 15pt;}

</style>
</head>
<body>
<div>
	<h1>데이터 송수신 실습 02</h1>
	<hr>
</div>
<div>
	 <span><%=userName %></span>님,
	 성적 처리가 완료되었습니다.<br>
	 회원님의 점수는 국어:<span><%=kor %></span>점, 영어:<span><%=eng %></span>점, 수학:<span><%=mat %></span>점 입니다.<br>
	 총점은 <span><%=tot %></span>점, 평균은 <span><%=String.format("%.1f", avg) %></span>점 입니다.<br>
</div>
</body>
</html>➰ 체크할 내용 ➰
1) 결과 값에 대한 처리를 할 경우에는 원본 데이터는 그대로 유지하고 보여주는 페이지에서 코드로 보여주고 싶은 방식으로 변경하여 보여주는 것을 추천한다.
→ 평균 값은 avg에 별도의 처리 없이 저장하고, 보여줄 때, 소수점 첫 째 자리까지 보여주도록 처리

# Send03.html
<body>
<div>
	<h1>데이터 송수신 실습 03</h1>
	<hr>
</div>

<div>
	<form action="Receive03.jsp" method="post">
		<table class="table">
			<tr>
				<th>정수1</th>
				<th>연산자</th>
				<th>정수2</th>
			</tr>
			<tr>
				<td>
					<input type="text" name="num1" class="txt">
				</td>
				<td>
					<select name="op">
						<option value="+">더하기</option>
						<option value="-">빼기</option>
						<option value="*">곱하기</option>
						<option value="/">나누기</option>
					</select>
				</td>
				<td>
					<input type="text" name="num2" class="txt">
				</td>
			</tr>
			<tr style="height: 30px;">
			</tr>
			<tr>
				<td colspan="3">
					<button type="submit" class="btn" style="width: 48%;">결과 확인</button>
				<button type="reset" class="btn" style="width: 48%;">취소</button>
				</td>
			</tr>
		</table>
	</form>
</div>
</body>➰ 체크할 내용 ➰
1) 전송해야하는 데이터 중 특수문자가 있을 경우에는 get이 아닌 post 사용이 좋음.
- 주소창에 사용되는 특수문자도 있기 때문에 get을 사용하는 것을 추천하지 않음.
- ex) 넘겨야 하는 value 값이 + / - / * / / 인데 주소창에 쓰이는 특수문자들이 있기 때문에 method는 post 사용
# Receive03.jsp
<%@ page contentType="text/html; charset=UTF-8"%>
<%-- 수업시간 풀이 --%>
<%
	// 스크립릿 영역

	// 이전 페이지(Receive03.html)로부터 넘어온 데이터 수신
	// → num1, num2, op

	String num1Str = request.getParameter("num1");
	String num2Str = request.getParameter("num2");
	String op = request.getParameter("op");

	String result = "";

	int num1=0;
	int num2=0;

	try
	{
		num1 = Integer.parseInt(num1Str);
		num2 = Integer.parseInt(num2Str);

		if (op.equals("+"))
			result = String.valueOf(num1+num2);
		else if (op.equals("-"))
			result = String.valueOf(num1-num2);
		else if (op.equals("*"))
			result = String.valueOf(num1*num2);
		else if (op.equals("/"))
		{
			//result = String.valueOf(num1/num2);
			//result = String.valueOf(num1/(double)num2);
			result = String.format("%.1f", num1/(double)num2);
		}
	}
	catch(Exception e)
	{
		System.out.println(e.toString());
	}
%>

<!DOCTYPE html>
<html>
<head>
<meta charset="UTF-8">
<title>Recevie03.jsp</title>
<style type="text/css">
	span {color: blue; font-weight: bold; font-size: 15pt;}
	#result {color: red;}
</style>

<link rel="stylesheet" type="text/css" href="css/main.css">
</head>
<body>
<div>
	<h1>데이터 송수신 실습 03</h1>
	<hr>
</div>
<div>
	입력하신 <span><%=num1 %></span>와(과) <span><%=num2 %></span>의
	연산 결과는 <span id="result"><%=result %></span> 입니다.
</div>
</body>
</html>➰ 체크할 내용 ➰
1) 내가 풀이하면서 놓친 것
Send03에서 넘겨주는 값을 "더하기" 이런 식으로 한글로 사용했는데,,! Receive에서 인코딩 코드를 넣어주지 않았다,,
그래서 당연히! if 문에서 제대로 문자열 비교를 하지 못했고 tot가 계속해서 0이 나오는 결과가 발생!! 삐용삐용🚨
🚨 한글을 넘겨 받을 경우 잊지 말자 인코딩!! 🚨


# Send04.html
✔ 필수항목을 입력하지 않은 경우 페이지가 넘어가지 않도록 하는 것이 중요 뽀인트라고 생각!
<!DOCTYPE html>
<html>
<head>
<meta charset="UTF-8">
<title>Send04.html</title>
<link rel="stylesheet" type="text/css" href="css/main.css">
<style type="text/css">
tr {height: 50px;}
input:focus {background-color: #eee;}
.msg {color: red; font-size: small; display: none;}
</style>
<script type="text/javascript">
function formCheck()
{
var userId = document.getElementById("userId");
var userPw = document.getElementById("userPw");
var userName = document.getElementById("userName");
var userTel = document.getElementById("userTel");
var idMsg = document.getElementById("idMsg");
var pwMsg = document.getElementById("pwMsg");
var nameMsg = document.getElementById("nameMsg");
var telMsg = document.getElementById("telMsg");
idMsg.style.display = "none";
pwMsg.style.display = "none";
nameMsg.style.display = "none";
telMsg.style.display = "none";
if (userId.value == "") //-- 아이디가 입력되지 않은 상황
{
idMsg.style.display = "inline";
userId.focus();
return false;
}
if (userPw.value=="") //-- 패스워드가 입력되지 않은 상황. else if 안된다!
{
pwMsg.style.display = "inline";
userPw.focus();
return false;
}
if (userName.value =="") //--이름이 입력되지 않은 상황
{
nameMsg.style.display = "inline";
userName.focus();
return false;
}
if (userTel.value == "") //-- 전화번호가 입력되지 않은 상황
{
telMsg.style.display = "inline";
userTel.focus();
return false;
}
return true;
}
</script>
</head>
<body>
<div>
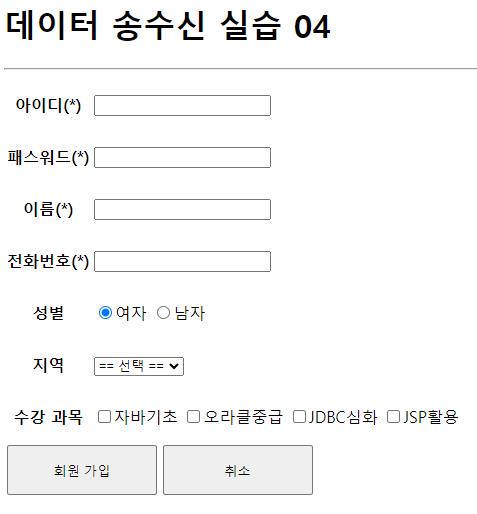
<h1>데이터 송수신 실습 04</h1>
<hr>
</div>
<div>
<form action="Receive04.jsp" method="post" onsubmit="return formCheck();">
<table class="table">
<tr>
<th>아이디(*)</th>
<td>
<input type="text" id="userId" name="userId" class="txt">
<span class="msg" id="idMsg">아이디를 입력하세요.</span>
</td>
</tr>
<tr>
<th>패스워드(*)</th>
<td>
<input type="password" id="userPw" name="userPw" class="txt">
<span class="msg" id="pwMsg">패스워드를 입력하세요.</span>
</td>
</tr>
<tr>
<th>이름(*)</th>
<td>
<input type="text" id="userName" name="userName" class="txt">
<span class="msg" id="nameMsg">이름을 입력하세요.</span>
</td>
</tr>
<tr>
<th>전화번호(*)</th>
<td>
<input type="text" id="userTel" name="userTel" class="txt">
<span class="msg" id="telMsg">전화번호를 입력하세요.</span>
</td>
</tr>
<tr>
<th>성별</th>
<td>
<label><input type="radio" name="userGender" id="female" value="여자"
checked="checked">여자</label>
<label><input type="radio" name="userGender" id="male" value="남자">남자</label>
</td>
</tr>
<tr>
<th>지역</th>
<td>
<select id="userCity" name="userCity">
<option>== 선택 ==</option>
<option value="서울">서울</option>
<option value="대전">대전</option>
<option value="광주">광주</option>
<option value="대구">대구</option>
</select>
</td>
</tr>
<tr>
<th>수강 과목</th>
<td>
<label><input type="checkbox" name="userSubject" id="check1" value="자바기초">자바기초</label>
<label><input type="checkbox" name="userSubject" id="check2" value="오라클중급">오라클중급</label>
<label><input type="checkbox" name="userSubject" id="check3" value="JDBC심화">JDBC심화</label>
<label><input type="checkbox" name="userSubject" id="check4" value="JSP활용">JSP활용</label>
</td>
</tr>
<tr>
<td colspan="2">
<button type="submit" class="btn" style="width: 150px; height: 50px;">회원 가입</button>
<button type="reset" class="btn" style="width: 150px; height: 50px;">취소</button>
</td>
</tr>
</table>
</form>
</div>
</body>
</html>➰ 체크할 내용 ➰
1) button 타입을 submit으로 하게 되면 submit 이라 제어 없이 바로 연결된 파일로 넘어가게 됨!
버튼 타입은 버튼으로 설정하자!
2) 필수 항목을 입력하지 않았을 경우 → 경고창이 아닌 입력하지 않은 부분에 안내 해주는 방식
- idMsg.style.display = "none"; : id가 idMsg인 앨리먼트의 .style을 .display 속성을 "none"으로 하겠다.
- if문을 사용해서 필수 항목인데 입력 받은 값이 없다면,
idMsg.style.display = "inline";을 활용하여 idMsg 엘리먼트를 화면에 인라인으로 표시하자!
- userId.focus(); : 입력 받지 않은 항목으로 커서 옮겨주기
3) 필수 항목 입력하지 않았을 경우, 연결된 페이지로 넘어가지 않도록 제어
① form 태그에서 onsubmit 사용
- onsubmit : submit 액션이 발생한 경우, 호출되는 자바스크립트 함수에서
return true; 할 경우 → 연결된 파일로 제어권 넘어가게 되고
return false; 할 경우 → 연결된 파일로 제어권이 넘어가지 않는다.
- 입력하지 않은 경우를 뽑아내는 if문에 return false; 사용하고, else 일 경우 return ture; 해주면 의도한 대로 구성 가능
- onsumit="return 호출할 함수명" : return 써야함을 잊지 말기~!
② 자바스크립트 영역에서 .submit() 사용
- document.getElementById("가져올 id").submit() : form 태그에 id를 부여하고 그 id를 가져와서 .submit() 실행
# Receive04.jsp
<%@ page contentType="text/html; charset=UTF-8"%>
<%
// 스크립릿 영역
// 이전 페이지(Send04.html)로부터 넘어온 데이터 수신
// → userId, userPw, userName, userTel, userGender, userCity, userSubject
request.setCharacterEncoding("UTF-8");
String userId = request.getParameter("userId");
String userPw = request.getParameter("userPw");
String userName = request.getParameter("userName");
String userTel = request.getParameter("userTel");
String userGender = request.getParameter("userGender");
String userCity = request.getParameter("userCity");
//check~!!!
String[] userSubjectArr = request.getParameterValues("userSubject");
String subjectStr ="";
if (userSubjectArr != null)
{
for (int i=0; i<userSubjectArr.length; i++)
{
subjectStr += "[" + userSubjectArr[i].toString() + "]";
}
}
%>
<!DOCTYPE html>
<html>
<head>
<meta charset="UTF-8">
<title>Receive04.jsp</title>
<link rel="stylesheet" type="text/css" href="css/main.css">
<style type="text/css">
span {color: blue; font-size: 15pt; font-weight: bold;}
</style>
</head>
<body>
<div>
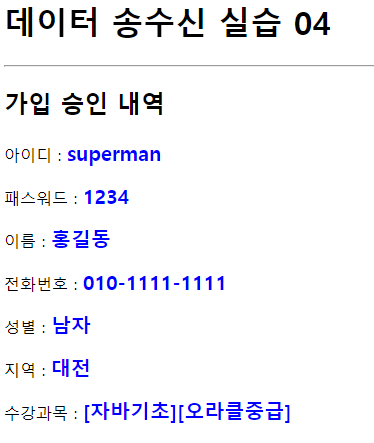
<h1>데이터 송수신 실습 04</h1>
<hr>
</div>
<div>
<h2>가입 승인 내역</h2>
<p>아이디 : <span><%=userId %></span></p>
<p>패스워드 : <span><%=userPw %></span></p>
<p>이름 : <span><%=userName %></span></p>
<p>전화번호 : <span><%=userTel %></span></p>
<p>성별 : <span><%=userGender %></span></p>
<p>지역 : <span><%=userCity %></span></p>
<p>수강과목 : <span><%=subjectStr %></span></p>
</div>
</body>
</html>
# Send05.html
<!DOCTYPE html>
<html>
<head>
<meta charset="UTF-8">
<title>Send05.html</title>
<link rel="stylesheet" type="text/css" href="css/main.css">
<script type="text/javascript">
function formChange(obj)
{
obj.submit();
}
</script>
</head>
<body>
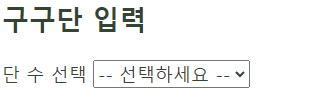
<div>
<h2>구구단 입력</h2>
<div>
<form action="Receive05.jsp" method="get">
단 수 선택
<select id="dan" name="dan" onchange="formChange(this.form)">
<option>-- 선택하세요 --</option>
<option value="1">1단</option>
<option value="2">2단</option>
<option value="3">3단</option>
<option value="4">4단</option>
<option value="5">5단</option>
<option value="6">6단</option>
<option value="7">7단</option>
<option value="8">8단</option>
<option value="9">9단</option>
</select>
</form>
</div>
</div>
</body>
</html>➰ 체크할 내용 ➰
1) obj 변수
- obj 변수(이 함수의 매개변수) 에는 form 객체가 저장되어 있다.
- 필요에 따라 정송하기 전에 검증 절차 추가하는 것이 가능!
2) obj.submit()
- 폼객체.submit() : 함수 호출을 통해 form 객체의 데이터를 서버로 전송하는 것 가능!
3) onchange
- 변화가 일어났는지 감지! 변화가 일어났다면 formChange 함수 실행(this.form)
# Receive05.jsp
<%@ page contentType="text/html; charset=UTF-8"%>
<%
// 이전 페이지(Send05.html)로부터 넘어온 데이터 수신
// → dan
String danStr = request.getParameter("dan");
int dan=0;
String result ="";
try
{
dan = Integer.parseInt(danStr);
for (int i=1; i<=9; i++)
{
result += String.format("%d * %d = %d<br>", dan, i, (dan*i));
}
}
catch (Exception e)
{
System.out.println(e.toString());
}
%>
<!DOCTYPE html>
<html>
<head>
<meta charset="UTF-8">
<title>Receive05.jsp</title>
<link rel="stylesheet" type="text/css" href="css/main.css">
</head>
<body>
<div>
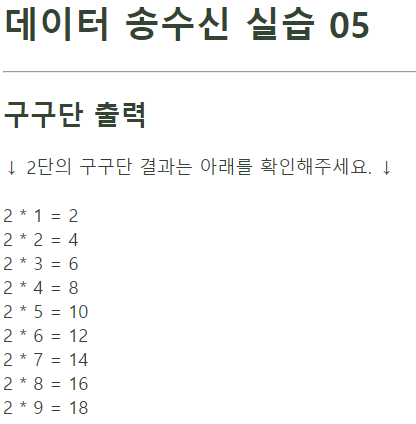
<h1>데이터 송수신 실습 05</h1>
<hr>
</div>
<div>
<h2>구구단 출력</h2>
<div>
↓ <%=dan %>단의 구구단 결과는 아래를 확인해주세요. ↓
<br><br>
<%=result %>
</div>
</div>
</body>
</html>